DIY Smart Home Automation: Install 3 Systems in 2 Hours
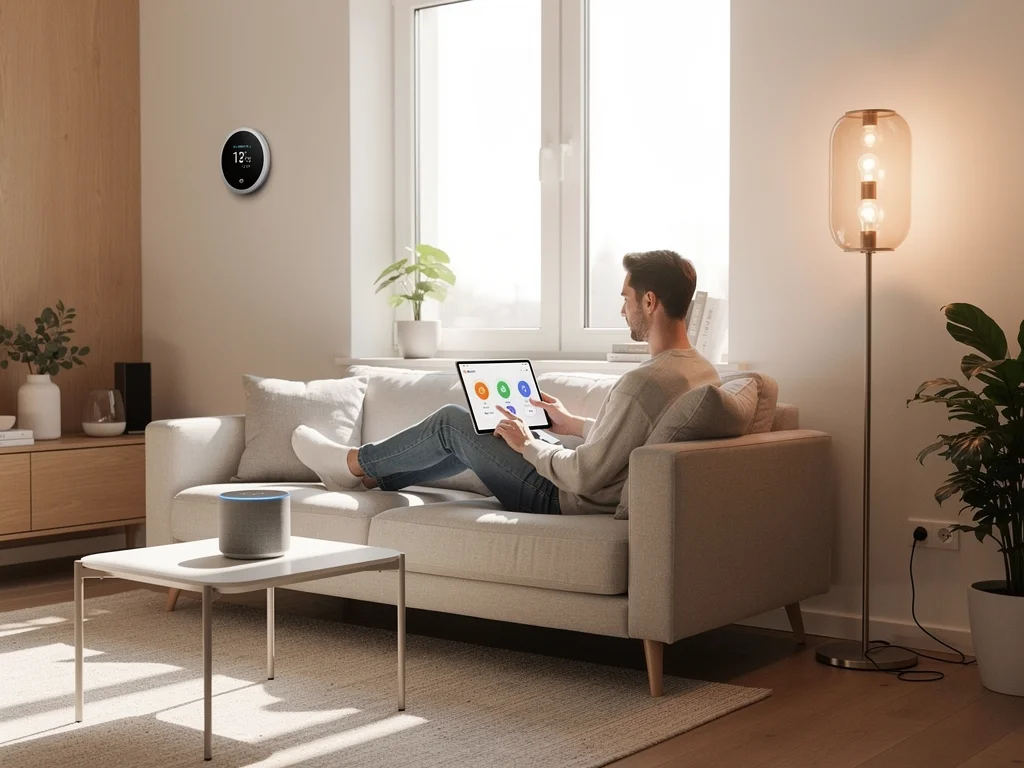
DIY smart home automation allows United States consumers to quickly and affordably install key systems like smart lighting, thermostats, and security devices, significantly enhancing convenience, energy efficiency, and home security within a two-hour timeframe.
Have you ever imagined transforming your home into a smart haven without the hefty price tag or complicated installations? For United States consumers, the dream of achieving DIY smart home automation is more accessible than ever, and surprisingly, it can be done in about two hours. This guide will walk you through setting up three essential smart home systems that promise to elevate your living experience, offering convenience, security, and energy efficiency with minimal effort.
understanding the smart home landscape for DIY enthusiasts
Embarking on a journey into smart home automation can feel daunting, but understanding the core principles makes it much simpler. For the average consumer in the United States, DIY smart home installations are designed to be user-friendly, often requiring little more than a smartphone and basic tools. The key is to select devices that integrate well and offer immediate, tangible benefits.
The market for smart home devices has exploded, offering everything from intelligent light bulbs to complex security systems. However, for a quick and impactful setup, focusing on foundational systems is crucial. These typically include smart lighting, climate control, and basic security, which collectively provide significant improvements to daily life without extensive technical know-how.
choosing the right smart home ecosystem
Before purchasing any devices, it’s wise to consider which smart home ecosystem best suits your needs. Major players like Amazon Alexa, Google Home, and Apple HomeKit offer different strengths and device compatibilities. Selecting one early on ensures your chosen devices can communicate seamlessly, avoiding frustrating compatibility issues down the line.
- Amazon Alexa: Widely compatible, vast device selection, voice-centric control.
- Google Home: Excellent AI integration, strong search capabilities, works well with Android devices.
- Apple HomeKit: High security and privacy focus, seamless integration with Apple products, intuitive interface.
Each ecosystem has its advantages, but the most important factor is choosing one that aligns with your existing technology and preferences. Compatibility is paramount for a smooth DIY smart home automation experience, ensuring that all your devices can be managed from a single, unified platform.
Ultimately, the goal is to create a cohesive environment where devices work in harmony. This initial planning phase, though seemingly small, saves a lot of time and frustration during installation. Understanding your ecosystem allows for informed decisions, leading to a more efficient and enjoyable smart home setup from the start.
system 1: smart lighting – illuminating your home with ease
Smart lighting is often the first step many United States consumers take into DIY smart home automation due to its simplicity and immediate impact. Replacing traditional bulbs with smart ones offers not just convenience but also significant energy savings and enhanced ambiance. The installation process is remarkably straightforward, typically involving screwing in a bulb and pairing it with an app.
Imagine controlling your lights from your couch, setting schedules for when you’re away, or even changing colors to match your mood. These functionalities are easily achievable with smart lighting systems. Brands like Philips Hue, Sengled, and Wyze offer reliable and affordable options that are perfect for beginners.
installation steps for smart light bulbs
The beauty of smart light bulbs lies in their plug-and-play nature. No complex wiring or electrical knowledge is required, making them ideal for a two-hour installation target. Most smart bulbs connect directly to your home’s Wi-Fi or via a small hub, which is usually included in starter kits.
- Unscrew old bulb: Carefully remove your existing light bulb from the fixture.
- Screw in smart bulb: Insert the new smart bulb into the same fixture.
- Download the app: Install the manufacturer’s app on your smartphone.
- Pair the bulb: Follow the app’s instructions to pair the bulb. This often involves turning the light on and off a few times.
- Customize settings: Use the app to set schedules, adjust brightness, or change colors.
Within minutes, you can have your first smart light up and running. Repeat this process for other lights you wish to automate. Focus on high-traffic areas initially, such as living rooms, kitchens, and bedrooms, to maximize the immediate impact of your DIY smart home automation efforts. The simplicity of smart lighting makes it a perfect starting point for any homeowner.
Once installed, smart lighting offers a level of control and flexibility that traditional lighting simply cannot match. From dimming lights for a movie night to ensuring your home looks occupied while you’re on vacation, the benefits are numerous and immediate, contributing to both comfort and peace of mind.
system 2: smart thermostat – optimizing climate control and energy savings
A smart thermostat is a powerful addition to any DIY smart home automation setup, offering substantial energy savings and unparalleled comfort control. Devices like the Ecobee, Nest, and Honeywell Home learn your preferences and adjust temperatures automatically, reducing wasted energy. This system might seem more complex than lighting, but modern designs have streamlined the installation for homeowners.
Beyond simple temperature scheduling, smart thermostats can integrate with other smart devices, respond to voice commands, and even track your home’s energy usage, providing insights to help you save more. For United States consumers looking to cut down on utility bills, a smart thermostat is an investment that quickly pays for itself.
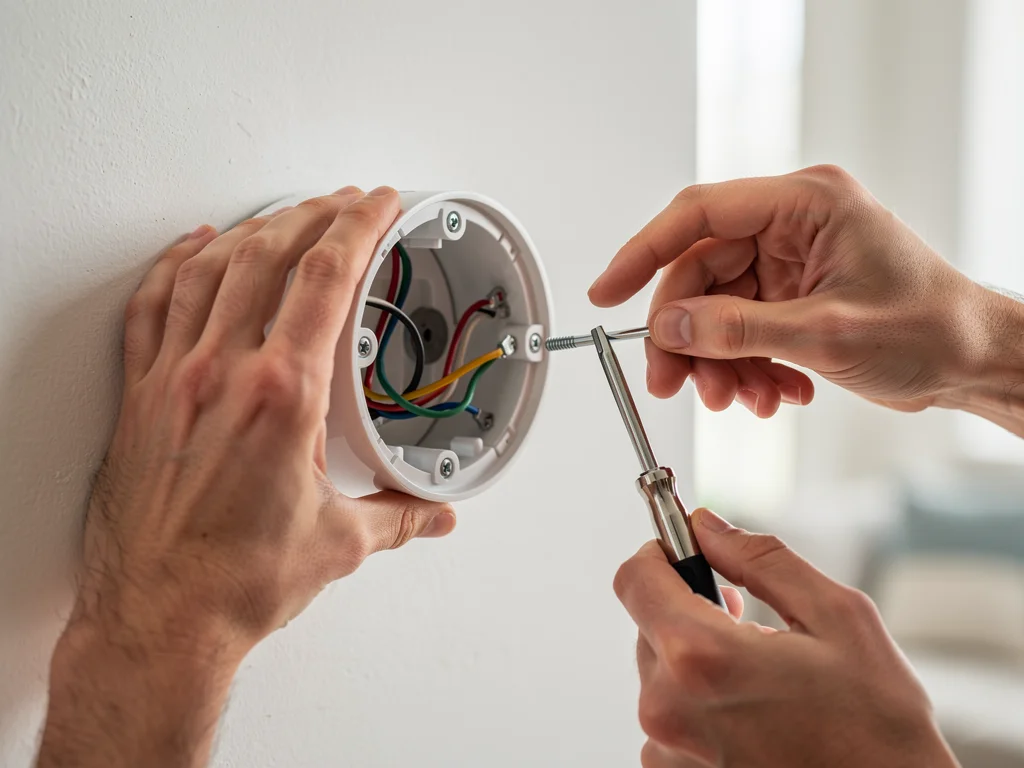
Before you begin, ensure your existing HVAC system is compatible with the smart thermostat you choose. Most manufacturers provide compatibility checkers on their websites. This crucial step prevents any last-minute surprises and ensures a smooth installation process.
step-by-step smart thermostat installation
While this system requires a bit more hands-on work than smart bulbs, it’s still well within the capabilities of a DIY enthusiast. Most smart thermostats come with clear, illustrated instructions and even video tutorials to guide you through each step. Remember to always turn off power to your HVAC system at the breaker box before touching any wires.
- Turn off power: Locate your circuit breaker and turn off the power to your HVAC system.
- Remove old thermostat: Carefully detach your old thermostat from the wall. Take a picture of the wiring for reference.
- Install new base plate: Mount the new smart thermostat’s base plate to the wall, feeding the wires through.
- Connect wires: Follow the smart thermostat’s wiring diagram to connect the wires. Refer to your photo if needed.
- Attach faceplate: Secure the smart thermostat’s faceplate to the base plate.
- Restore power and configure: Turn the power back on and follow the on-screen prompts to connect to Wi-Fi and configure settings.
This process typically takes about 30-60 minutes, depending on your comfort level with basic home repairs. The initial setup and learning phase for the thermostat’s algorithms will then begin, optimizing your home’s climate control over the next few days. The long-term benefits in comfort and savings make this DIY smart home automation project incredibly rewarding.
Once your smart thermostat is operational, you’ll notice an immediate difference in how efficiently your home is heated and cooled. The ability to control your home’s temperature from anywhere, or have it adjust automatically based on occupancy, provides a level of comfort and convenience that quickly becomes indispensable.
system 3: basic smart security – enhancing home protection
For United States consumers, enhancing home security is a primary motivator for adopting smart home technology. Basic smart security systems, such as smart door locks and indoor cameras, offer an excellent entry point into safeguarding your home without complex installations or monthly fees. These devices provide peace of mind by allowing you to monitor and control access to your property remotely.
Smart door locks replace traditional deadbolts, offering keyless entry and the ability to lock/unlock your door from anywhere via a smartphone app. Indoor cameras provide real-time video feeds, motion detection alerts, and two-way audio, allowing you to check in on pets, children, or elderly family members. Popular brands include August, Yale, and Arlo for locks, and Wyze, Ring, and Eufy for cameras.
installing smart door locks and indoor cameras
Both smart door locks and indoor cameras are designed for relatively easy DIY installation. Smart locks often replace existing deadbolts using standard tools, while indoor cameras typically just need to be plugged in and connected to Wi-Fi. It’s crucial to ensure a strong Wi-Fi signal in the installation areas for optimal performance of these devices.
- For Smart Door Locks:
- Remove old deadbolt: Unscrew and remove your existing deadbolt assembly.
- Install new lock components: Follow the smart lock’s instructions to install the new exterior keypad/housing, interior thumb turn, and latch mechanism.
- Connect to app: Pair the lock with its corresponding smartphone app via Bluetooth or Wi-Fi.
- Calibrate and test: Calibrate the lock if necessary and test its functionality from the app.
Installing a smart lock usually takes about 20-30 minutes, requiring only a screwdriver. The key benefit is not just keyless entry but also the ability to grant temporary access codes to guests or service providers, and to receive notifications whenever the door is locked or unlocked. This adds a significant layer of control and security to your home.
For indoor cameras, the process is even simpler. Find a suitable location with a power outlet and good Wi-Fi coverage. Plug in the camera, download the app, and follow the on-screen instructions to connect it to your home network. Many cameras offer magnetic bases or adhesive mounts for easy placement without drilling.
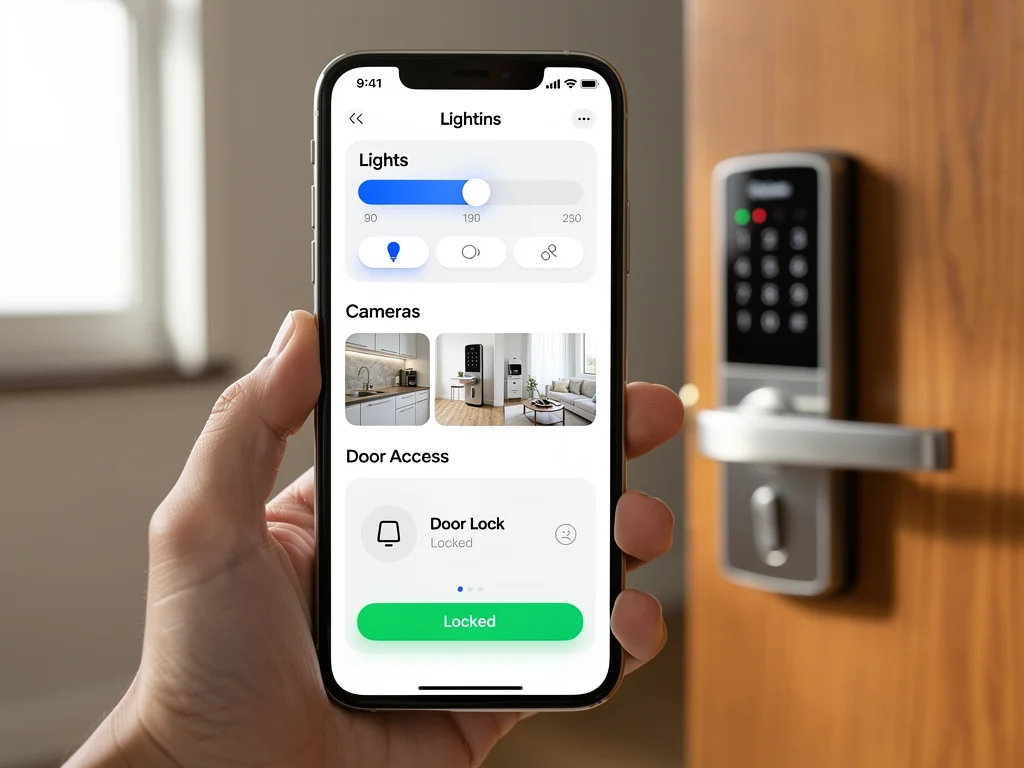
Once your basic smart security systems are in place, you’ll gain an immediate sense of enhanced protection. The ability to monitor your home, receive alerts, and control access remotely provides invaluable peace of mind, making it a cornerstone of effective DIY smart home automation.
integrating your new smart home devices
After successfully installing your smart lighting, thermostat, and basic security devices, the next crucial step in your DIY smart home automation journey is integration. This is where the true power of a smart home comes alive, as devices begin to communicate and work together, creating automated routines and seamless control. For United States consumers, the goal is often to simplify daily tasks and enhance overall home efficiency.
Integration typically happens within the ecosystem app you chose earlier (Amazon Alexa, Google Home, or Apple HomeKit). These platforms act as a central hub, allowing you to manage all your compatible devices from a single interface. The process usually involves adding each device to the central app and then creating routines or scenes.
creating smart home routines and scenes
Routines and scenes are sequences of actions triggered by a single command or event. They are the essence of automation, making your home respond intelligently to your needs without constant manual input. For example, a ‘Good Morning’ routine could turn on lights, adjust the thermostat, and unlock the front door at a specific time.
- Define triggers: Decide what will initiate a routine (e.g., time of day, motion detection, voice command).
- Select actions: Choose which devices will perform specific actions (e.g., turn lights on, set temperature, lock doors).
- Combine devices: Link actions across different devices to create a cohesive experience.
- Test and refine: Run your routines and adjust them until they work perfectly for your lifestyle.
For instance, a ‘Leaving Home’ routine could lock all smart doors, turn off all smart lights, and set your smart thermostat to an energy-saving temperature, all with one voice command or tap on your phone. This level of integrated control maximizes the benefits of your DIY smart home automation efforts, creating a truly responsive living space.
Successful integration not only streamlines your daily life but also enhances the overall value and functionality of your smart home. By making your devices work in concert, you unlock their full potential, transforming a collection of individual gadgets into a truly intelligent home system.
troubleshooting common DIY smart home automation issues
Even with user-friendly devices, occasional hiccups can arise during DIY smart home automation installations. For United States consumers, understanding common issues and their solutions can save a lot of frustration and ensure your two-hour installation goal remains on track. Most problems are minor and can be resolved with simple troubleshooting steps, often related to network connectivity or device pairing.
The most frequent challenge is Wi-Fi connectivity. Smart devices rely heavily on a stable and strong Wi-Fi signal. If a device struggles to connect or frequently disconnects, its performance will be severely impacted. Another common issue involves device pairing, where a new device might not immediately connect to your chosen smart home ecosystem.
quick fixes for smart home problems
Before calling for technical support, try these straightforward solutions. Many issues can be resolved quickly, allowing you to get back to enjoying your automated home.
- Check Wi-Fi signal: Ensure your router is centrally located and your devices are within range. Consider a Wi-Fi extender for weak signal areas.
- Restart devices: Power cycle the problematic smart device, your router, and your smartphone. This often resolves temporary glitches.
- Re-pair device: If a device isn’t responding, try removing it from the app and pairing it again, following the manufacturer’s instructions carefully.
- Update firmware/app: Make sure both your smart device’s firmware and the control app on your phone are updated to the latest versions.
- Review compatibility: Double-check that your devices are indeed compatible with your chosen smart home ecosystem and with each other.
Sometimes, simply reading the device’s manual or checking the manufacturer’s online support forum can provide tailored solutions to specific problems. Many smart home communities also offer valuable insights and troubleshooting tips from experienced users. Persistence and a methodical approach to troubleshooting are key to overcoming any challenges.
By being prepared for potential issues and knowing how to address them, you can maintain the smooth operation of your DIY smart home automation system. These minor setbacks are a normal part of integrating new technology, and resolving them builds confidence in managing your intelligent home.
maximizing your smart home investment: beyond the basics
Once you’ve successfully completed your initial DIY smart home automation setup with smart lighting, a thermostat, and basic security, you’ve laid a strong foundation. For United States consumers, the next step is often to explore how to further maximize this investment. Moving beyond the basics involves expanding your system, delving deeper into automation, and continuously seeking ways to enhance convenience, security, and efficiency.
The beauty of smart home technology is its scalability. You can gradually add more devices and functionalities as your needs evolve and your budget allows. This continuous improvement ensures your home remains at the forefront of modern living, always adapting to provide the best possible experience.
expanding your smart home capabilities
Consider integrating additional devices that complement your existing setup and address other aspects of home management. These can range from entertainment to advanced security or even health monitoring.
- Smart Plugs: Turn any traditional appliance into a smart device, controlling lamps, coffee makers, or fans remotely.
- Outdoor Cameras: Extend your security perimeter to monitor your property’s exterior.
- Smart Blinds/Shades: Automate window coverings for light control, privacy, and energy efficiency.
- Voice Assistants: Fully leverage your smart speakers for hands-free control of all your integrated devices.
Exploring advanced automation features, such as geofencing (where your home reacts to your proximity) or complex conditional routines (e.g., ‘If motion detected after midnight, turn on hallway light to 10% brightness’), can take your smart home to the next level. These features allow your home to anticipate your needs and react intelligently without direct input, truly embodying the promise of DIY smart home automation.
Staying informed about new smart home products and software updates is also vital. The technology is constantly evolving, with new features and integrations regularly becoming available. By keeping your system updated and exploring new possibilities, you ensure your smart home remains efficient, secure, and perfectly tailored to your lifestyle.
| Key Point | Brief Description |
|---|---|
| Smart Lighting | Easy to install, offers convenience, energy savings, and ambiance control via app or voice. |
| Smart Thermostat | Optimizes climate control, learns preferences, and significantly reduces energy consumption. |
| Basic Smart Security | Smart locks and indoor cameras enhance home protection and offer remote monitoring. |
| Integration & Troubleshooting | Connect devices via ecosystems for routines; resolve common issues like Wi-Fi or pairing. |
Frequently Asked Questions about DIY Smart Home Automation
Yes, for basic systems like smart light bulbs, plug-in smart devices, and simple security cameras, installation is often quick. The two-hour goal is realistic if you’ve done a little research beforehand, chosen compatible devices, and have basic tools ready. More complex setups, like smart thermostats, might take slightly longer but are still manageable for DIYers.
For most DIY smart home projects, you’ll only need a few basic tools. A screwdriver (Phillips and flathead), a smartphone or tablet for app installation, and a stable Wi-Fi connection are usually sufficient. Some installations, like smart thermostats, might require wire strippers, but instructions will specify if these are necessary.
Choosing a primary smart home ecosystem (like Alexa, Google Home, or HomeKit) is highly recommended for a seamless experience. It ensures better compatibility and allows you to control all your devices from a single app or voice assistant, simplifying management and enabling complex routines across different device types. Mixing ecosystems can lead to compatibility issues.
Absolutely. Smart thermostats can significantly reduce heating and cooling costs by optimizing temperature schedules and learning your preferences. Smart lighting, especially LED bulbs, consumes less energy and can be programmed to turn off when not needed. These efficiencies contribute to noticeable savings on your monthly utility bills over time.
Privacy is a valid concern with any connected device. To mitigate risks, choose reputable brands known for their security practices, use strong, unique passwords for all accounts, and enable two-factor authentication whenever possible. Regularly update device firmware and review privacy settings within the apps to understand and control your data.
Conclusion
Embracing DIY smart home automation is no longer a futuristic dream but a tangible reality for United States consumers, offering a path to a more convenient, secure, and energy-efficient lifestyle. As demonstrated, installing three key systems—smart lighting, a smart thermostat, and basic smart security—is entirely achievable within a two-hour timeframe with careful planning and a few simple steps. The immediate benefits of enhanced control, reduced energy consumption, and increased peace of mind make these initial investments incredibly worthwhile. As you become more comfortable, the possibilities for expanding and integrating your smart home grow, continuously enhancing your living experience. Start your smart home journey today, and discover how effortless and rewarding modern home automation can be.
Related Posts: